A gallery of my work organized by year.
An experiment in synthetic lighting.
While random-surfing through various comp-sci sites looking for something vaguely photography or graphics focused that would also satisfy the programmer in me, I came across a series of articles from the 90s about synthetic lighting.  The premise is that you separate out each light source in a scene, including a shot of ONLY ambient light in order to allow you to do neat things with the lighting in post.  Reconstructing lighting in a physical scene within a digital scene, alterations of light levels, colors, intensities, etc… even creating ‘negative’ lights that subtract light from a scene.   All of this is the bread-n-butter for 3D artists, mainly because their entire world is synthetic.  However, for photographers it’s a bit more complicated.
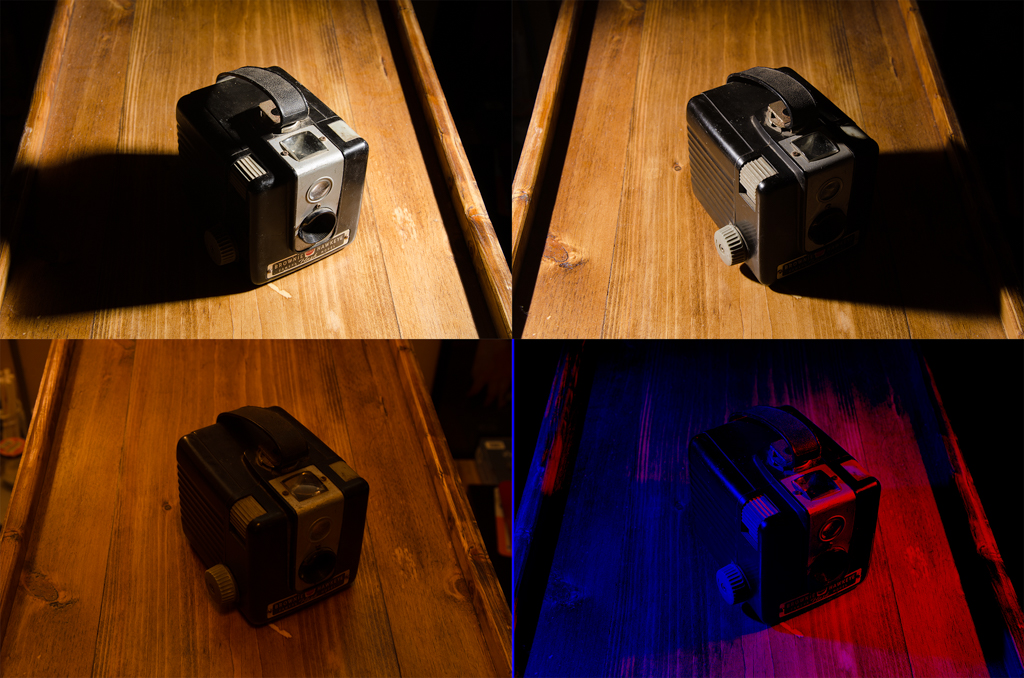
After reading several papers and blog posts about it, I decided to try my hand at a simple demonstration of the technique.  What I did was take a static object and shoot three shots of it.  One ambient, one with a strobe on the left, and one with a strobe on the right.  Then, using some photoshop magic, created an interesting synthetic lighting setup that let me do somethign I could only have done with gels and a lot more fiddling with light levels.
Rather than talk about, let’s get down to the fun. Get your camera out, take an ambient shot and a shot with each of two lights individually lighting the same object. LOCK DOWN the camera, lights and object. You’ll be compositing all three shots together a couple of times during all of this. Everything has to line up perfectly.
Start by taking three photos as follows:
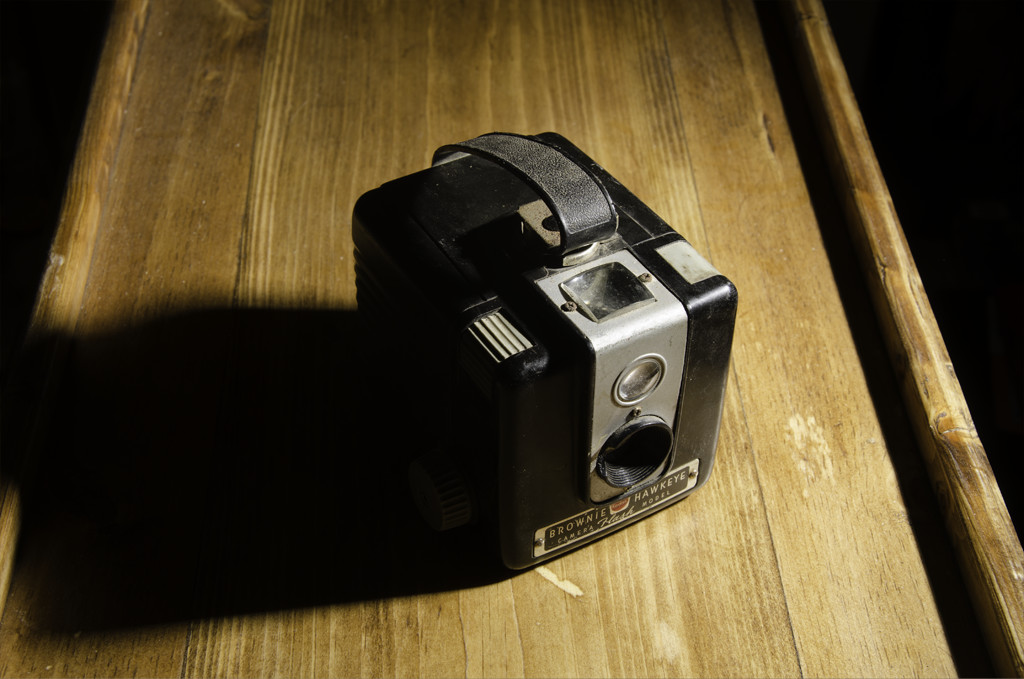
Ambient Light
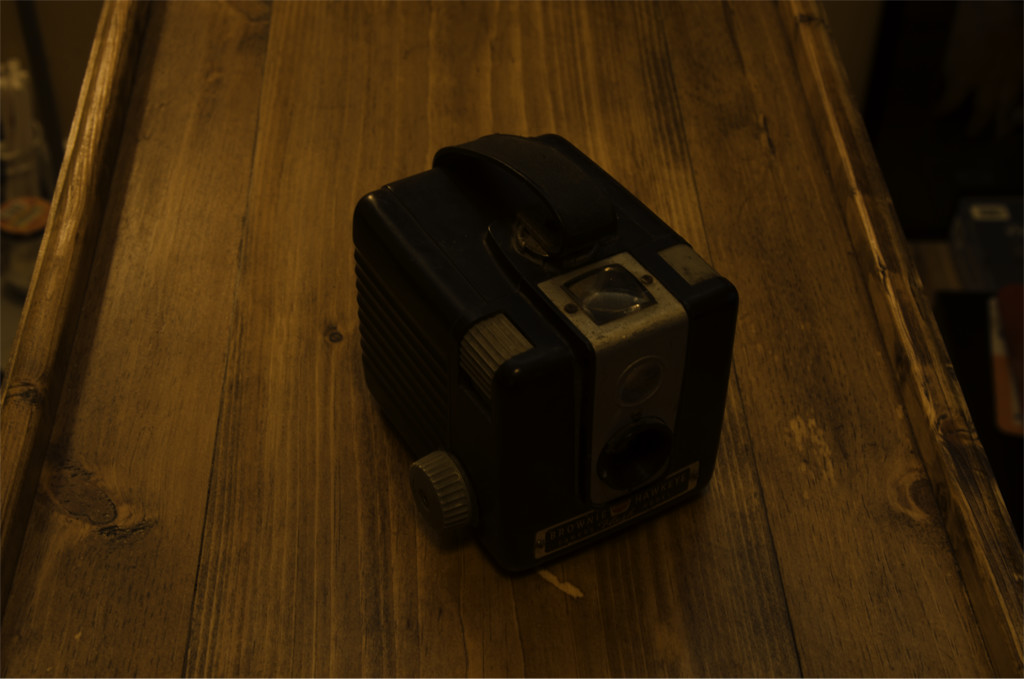
This is an ambient light only shot.
Left Flash Only
This image was shot with a naked speedlight to camera left.
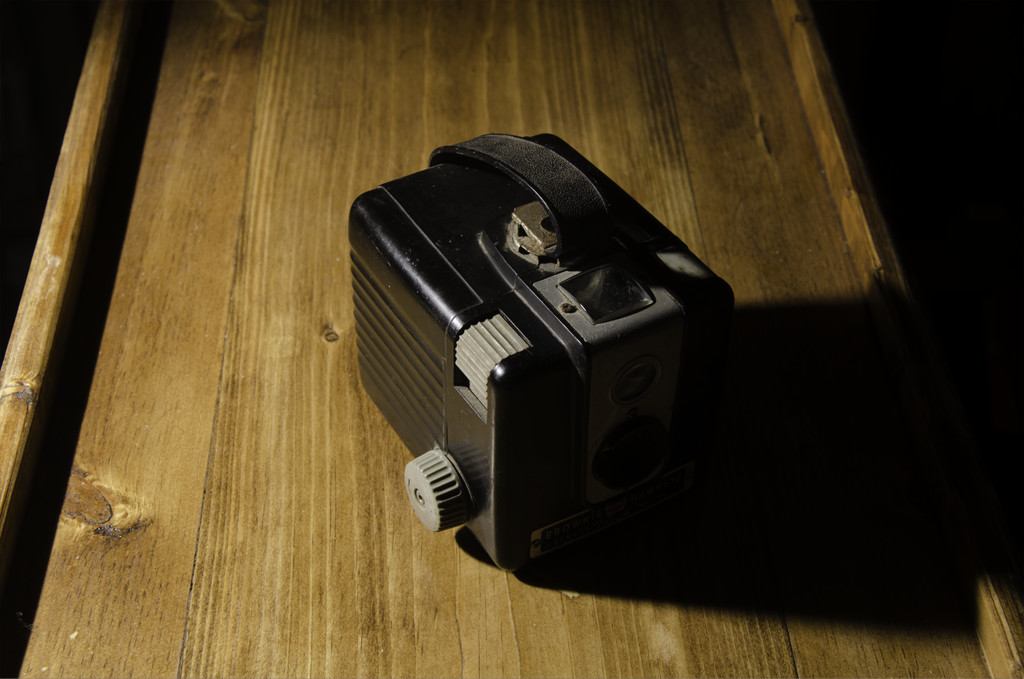
flash right only
This image was shot with a speedlight to camera right.
Now comes the fun. Load the images into Photoshop, name them something appropriate, like Bob, Sue and Alice, then group together. Call that group “Original”. This will give you a copy of your original shots to go back to if you mess something up or just want to keep experimenting.
Duplicate that group and call the new group ‘Subtract’
Name the images as follows:
- Subtract-Right for flash right only
- Subtract-Left for flash left only
- Subtract-Ambient for ambient only
Add two blank layers and fill one with red (255,0,0) and one with blue (0,0,255)
Select the RED layer then:
Select Image -> apply image and fill in the dialog box as follows:
- layer = “subtract right”
- channel = rgb
- invert selected
- blending:Â subtract
- opacity: 100%
- scale: 1
- offset: -64 — note: play with the offset to get the intensity you like. higher the offset number, the more intense the red.
You should now have something that looks kind of like this:
Red Layer
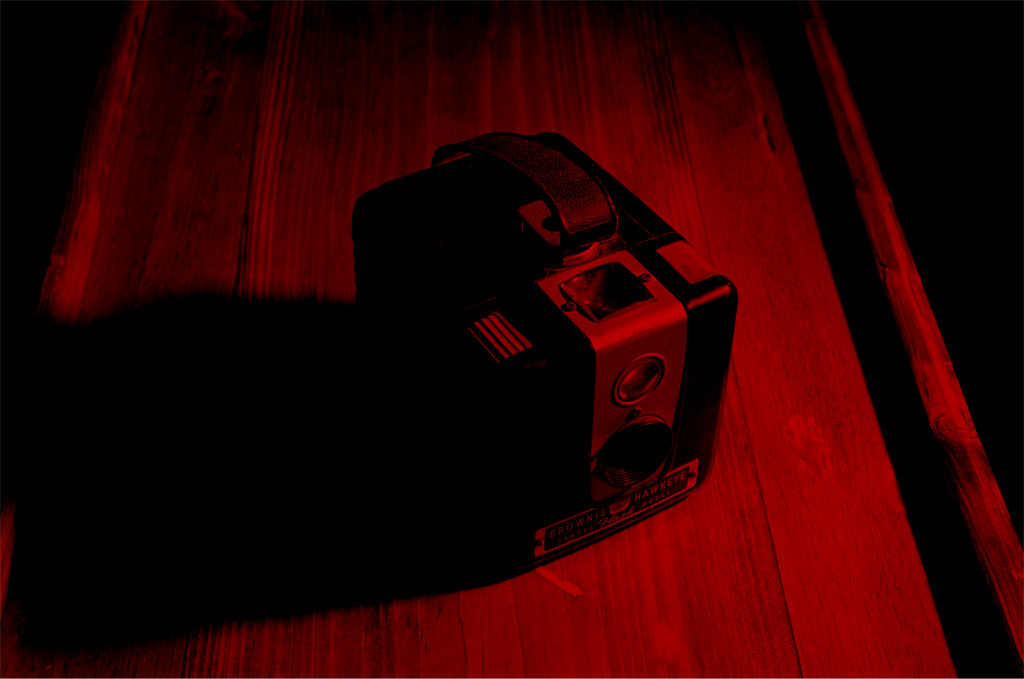
This is the result of subtracting the right lit shot from a solid red layer.
Now, select the BLUE layer
Do the same layer but I used an offset of 8 because the flash left image was a bit darker (about half a stop) than the right and the blue channel is “weaker” and needed a bump in intensity. You, initially, want both red and blue intensity to be about the same. You can adjust them in the next step.
It’ll look something like this:
Blue Layer

This is the result of subtracting the left lit shot from a solid blue layer.
For my image, the magic:
I set the layer order to red -> blue -> ambient
I then alt-click to set the red and blue layers to only affect the ambient layer.
Set the blending mode of the red layer to ‘lighter color’ and 50% opacity
Set the blending mode of the blue layer to ‘lighter color’ and leave at 100% opacity
It’ll look something like this:
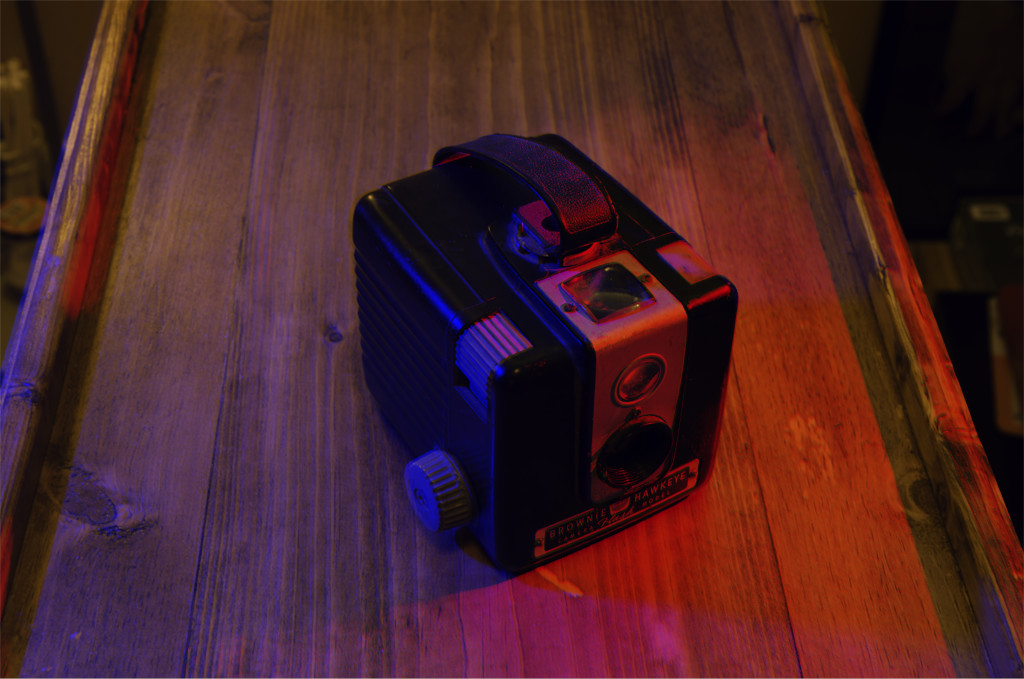
This is the final composite image showing the results of this technique.
Because my original ambient image was quite dark, this image comes out pretty dark as well. If you do any processing of the images, I recommend doing them before the creation of the blue / red channels (or whatever you’re going to do with the light channels) because you’re subtracting the seperated lighting shots from the ambient shot. Making changes to any of those after the fact can make for some interesting, and often bizarre, end results.
There you go. With this technique you can do some really interesting things with your lighting.
Go experiment and come back and tell us what you came up with.
Comments are Disabled